|
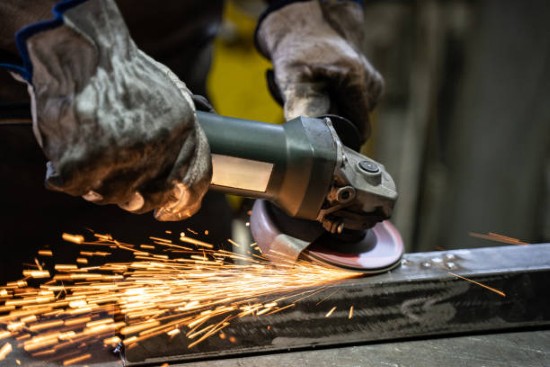
Mowing the lawn is a summer ritual for many people, but it can be frustrating if your mower blades are dull. A sharp blade makes quick work of the grass, while a dull blade can tear and rip the grass, leaving brown patches in your yard. You don’t need to take your mower to a professional to get it sharpened. You can do it yourself with an angle grinder. With an angle grinder, you can do it yourself. Using a few simple steps, you can have sharp blades that will make quick work of your lawn. Read on to learn how to sharpen mower blades with an angle grinder. What is an Angle Grinder?An angle grinder is a power tool that’s equipped with abrasive discs or wheels. These discs or wheels are made of materials like aluminum oxide or silicon carbide, and they’re designed to grind down metal. You can use an angle grinder to grind down the metal on your mower blades How to Sharpen Your Mower Blades with an Angle Grinder?Lawn mower blades dull over time from contact with rocks, dirt, and grass. A sharp blade is essential for a healthy lawn because it cuts the grass cleanly, preventing disease and promoting growth. While you can take your lawn mower to a shop to have the blades sharpened, it's easy to do it yourself at home with an angle grinder. Here's a step-by-step guide on how to sharpen your lawn mower blades with an angle grinder: Step 1: Check the Manufacturer's InstructionsBefore you sharpen your lawn mower blades, check the manufacturer's instructions to make sure that it's safe to use an angle grinder on the blades. Some manufacturers may void the warranty if you sharpen the blades yourself. Step 2: Remove the BladeTo sharpen your lawnmower blade, you'll need to remove it from the mower. Disconnect the spark plug to prevent the mower from accidentally turning on. Then, use a wrench to loosen the bolts that hold the blade in place. Once the bolts are loose, carefully remove the blade. Step 3: Inspect the BladeInspect the blade to look for any damage, such as cracks or chips. If the blade is damaged, it will need to be replaced. Step 4: Sharpen the BladeNow you're ready to sharpen the blade. Put on safety goggles and gloves to protect yourself from the sparks generated by the angle grinder. Then, attach a metal grinding wheel to the angle grinder. To sharpen the blade, start the grinder and hold it up to the blade. Apply light pressure as you move the grinder across the blade. Be sure to sharpen both sides of the blade evenly. After a few passes with the grinder, check the blade to see if it's sharp. If not, continue grinding until it is. Step 5: Reattach the BladeOnce the blade is sharp, you can reattach it to the mower. Clean off any debris from the blade or the mower. And, align the blade with the holes in the mower and hand-tighten the bolts. After that, use a wrench to tighten the bolts. Before you start using the mower again, be sure to reconnect the spark plug. Now you know how to sharpen your lawn mower blades with an angle grinder! With a sharp blade, your lawn will be looking better than ever. Final ThoughtsWhile an angle grinder is the best tool for the job, you can also use a file or bench grinder to sharpen your lawn mower blade. Whichever method you choose, be sure to take your time and follow the manufacturer's instructions to ensure a safe and effective result. Now that you know how to sharpen mower blades with an angle grinder, put this valuable skill to use and enjoy a beautiful, well-manicured lawn all season long!
0 Comments
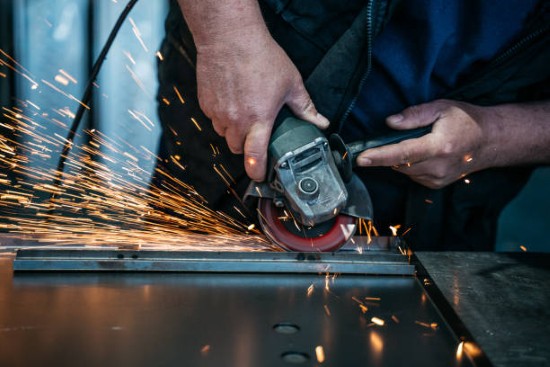
Cutting concrete can be a difficult task without the proper tools and techniques. An angle grinder is a versatile tool that can be used for a variety of tasks, including cutting concrete. However, in order to use an angle grinder to cut concrete, you must first understand safety precautions. In this post, we will discuss the best way to use an angle grinder for cutting concrete, as well as the necessary safety precautions. The Steps to Cutting Concrete with an Angle Grinder Cutting concrete is a tough job, but it doesn't have to be difficult. Here's a step-by-step guide to using an angle grinder to cut concrete: Step 1: Put on PPEBefore you start cutting concrete, it's important to put on the proper personal protective equipment (PPE). PPE will protect you from harmful dust particles and flying debris. Be sure to wear safety glasses, a dust mask, and gloves. Step 2: Select the Right BladeChoosing the right blade is essential for cutting concrete. For general purpose cutting, a diamond blade with a soft bond is a good choice. However, if you're cutting concrete with reinforcement, you'll need to use a blade with a hard bond. Step 3: Prep the AreaBefore you start cutting, it's important to prep the area. Clear away any debris or objects that might get in the way. Then, use a tape measure to mark the cutting line. For straight cuts, use a chalk line or a laser level to ensure that your cut is straight. Step 4: Mark the ConcreteOnce you've prepped the area, it's time to mark the concrete. For small cuts, you can use a pencil or a chisel. For larger cuts, it's best to use spray paint. Step 5: Cut the ConcreteNow it's time to start cutting. If you're using a diamond blade, be sure to keep it wet. This will help to prevent the blade from overheating. Start the cut by applying light pressure. Then, increase the pressure as you go. For best results, use a slow and steady motion. Step 6: Remove the ConcreteAfter you've cut through the concrete, you'll need to remove the pieces. For small cuts, you can use a hammer and chisel to break up the concrete. For larger cuts, you can use a sledgehammer or an electric jackhammer. Step 7: Clean UpOnce you've removed all of the concrete, it's time to clean up. Be sure to remove any debris or dust from the area. Then, dispose of the concrete properly. By following these steps, you can easily cut through concrete with an angle grinder. ConclusionWith the right tools and a little know-how, you can easily cut through concrete. Just be sure to wear PPE and to use the proper blade for your project. Always work carefully to avoid injury. If you're looking for a powerful and versatile tool to help with your concrete cutting projects, an angle grinder is a good choice.
When you need to adjust the air compressor pressure regulator, it can be confusing to know how to do it. Not only is adjusting the air compressor pressure regulator important for getting the most out of your machine, but if it's not done correctly you could damage the equipment. The air compressor pressure regulator is a device that controls the pressure of the air compressor. It does this by controlling the amount of air that enters the compressor. We're here to help with a step-by-step guide on how to adjust air compressor pressure regulators. Just follow the steps below and you'll have it done in no time. Tools Auditor's Tools Auditor Author is constantly updating technology to ensure our customers have the most up-to-date information available. Instructions for Adjusting the Pressure Regulator on an Air CompressorBefore getting started, it is always important to check the user manual that came with your air compressor pressure regulator to see what the specific manufacturer's requirements and suggestions are. After familiarizing yourself with the manufacturer’s instructions, you will then need to gather a few supplies. These supplies may include an adjustable wrench, pliers, and a screwdriver. Once you have gathered your supplies, you can then begin the process of adjusting your air compressor pressure regulator. 1. Find the Adjustment Knob:The first step is to locate the adjustment knob on your pressure regulator. It is typically located on the side of the regulator and may have a picture of a gauge next to it. Once you have found the adjustment knob, you will then use your adjustable wrench to loosen the knob so that you can turn it. 2. Let your Air Compressor Build Pressure:The next step is to start your air compressor and allow it to build up pressure. As the air compressor builds up pressure, you will need to keep an eye on the gauge to see what the current psi (pounds per square inch) reading is. 3. Adjust the Pressure:Once you have let your air compressor build up pressure, you will then use the adjustment knob to turn it to the desired psi that you want your air compressor to be set at. It is important to remember that you will need to use your wrench to hold the knob in place while you are turning it so that it does not move back to the original setting. 4. Check the Gauge:After you have adjusted the pressure, you will then need to check the gauge again to make sure that it is displaying the correct psi. If it is not, you will need to repeat steps 2-4 until it is displaying the desired psi. 5. Turn off Air Compressor:Once you have verified that the gauge is displaying the correct psi, you can then turn off your air compressor. Just be sure to double check the pressure one last time before you walk away from it. 6. Tighten Adjustment Knob:The last step is to use your wrench to tighten the adjustment knob so that it does not move from the setting that you put it at. And that's it! You have now successfully adjusted the pressure regulator on your air compressor. Final ThoughtsNow that you know how to adjust air compressor pressure regulator, it is important to understand when you should and shouldn't adjust the pressure. As a general rule of thumb, you should only adjust the pressure when absolutely necessary. This is because too much or too little pressure can cause serious damage to your air compressor. Thanks for reading and be sure to check back soon for more helpful tips and tricks.
|

 RSS Feed
